
Wall tiles in the living room aren’t just a kitchen or bathroom trend anymore. They’re reshaping how homeowners think about accent walls, fireplace surrounds, and entryway statements. Whether you’re drawn to clean subway tiles, dramatic marble, or textured stone-look panels, living room wall tiles design offers a practical way to add character while keeping maintenance simple. Unlike paint or wallpaper, tiles withstand spills, dust, and daily wear, making them ideal for high-traffic areas or homes with pets and kids. This guide walks you through popular tile styles, material choices, and the honest installation truth so you can decide whether tile is right for your space and budget.
Table of Contents
ToggleKey Takeaways
- Living room wall tiles design offers superior durability and low maintenance compared to paint or wallpaper, withstanding spills, dust, and daily wear in high-traffic areas.
- Subway tiles remain affordable and versatile ($1–4 per square foot), while marble and luxury finishes ($8–15+ per square foot) add upscale appeal but require regular sealing and careful maintenance.
- Porcelain tile is denser and more stain-resistant than ceramic, making it the better choice for living rooms where moisture or spills are possible.
- Proper installation success depends on thorough prep work, including waterproofing primers, chalk lines for balanced layouts, and correct thin-set application with a notched trowel at 45-degree angles.
- Larger-format tiles (18×36 inches) create a modern, streamlined aesthetic but require perfectly flat drywall and often benefit from professional installation to avoid cracking.
- Weekly damp-cloth cleaning and monthly pH-neutral cleaner maintenance keeps tiles pristine, while sealed natural stone should be resealed every 1–3 years based on water-bead tests.
Why Wall Tiles Transform Your Living Room
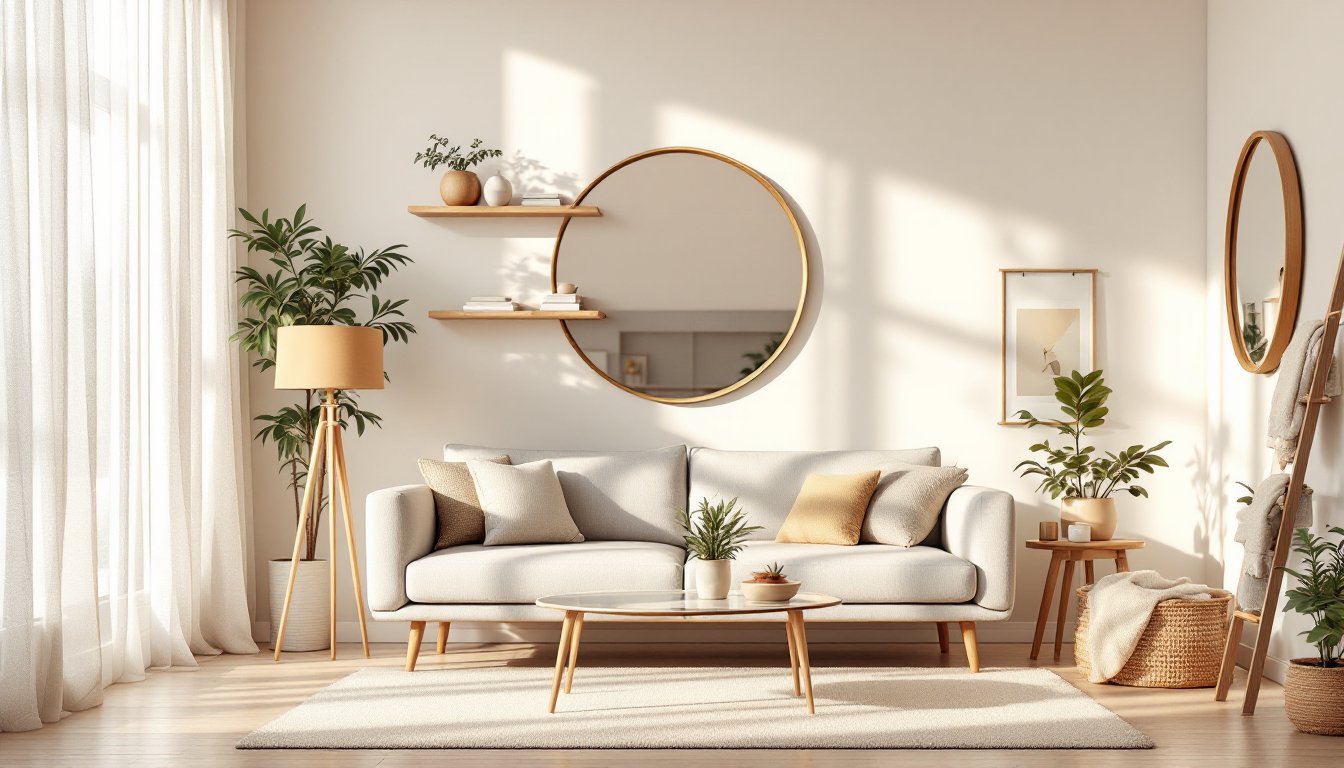
Wall tiles bring durability and visual impact that paint alone can’t match. Unlike drywall finishes, tile stands up to bumps, scuffs, and moisture without repainting. For fireplace surrounds, behind TV stands, or feature walls, tiles create a finished, intentional look while protecting underlying surfaces.
Tiles also offer flexibility in scale and finish. A 3×12-inch subway tile feels clean and contemporary, while larger-format planks (12×24 or 18×36) create a streamlined, modern aesthetic. Matte finishes hide fingerprints better than glossy ones, and textured tiles add depth without needing artwork.
The resale appeal is real, too. Potential buyers see tile as an upgrade, especially in contemporary or transitional homes where quality materials signal thoughtful renovation. Unlike trendy paint colors, neutral tile choices age well and adapt to different décor styles over time.
Popular Living Room Wall Tile Styles
Subway Tiles & Geometric Patterns
Subway tiles remain the go-to choice for a reason: they’re affordable, versatile, and look polished in both traditional and modern spaces. Standard 3×6-inch subway tiles in white or light gray create a timeless backdrop, while colored versions (soft blue, warm beige, pale terracotta) add personality without shouting.
For pattern, you have options beyond the classic horizontal stack. Herringbone layout (angled bricks) demands more cuts and takes longer to install, but the visual payoff is striking. Stacked pattern is fastest, straight rows, minimal waste. Running bond (offset rows) splits the difference in complexity and visual interest.
Geometric tiles, hexagons, diamonds, small-format mosaics, work best on accent walls or behind seating areas. They draw the eye and become a conversation piece. A word of caution: busy patterns can shrink a small room visually, so pair them with neutral furniture and plenty of breathing room.
Marble & Luxury Finishes
Marble and limestone tiles signal luxury, but they demand respect. Honed marble (matte finish) feels softer than polished marble and hides imperfections better, a practical choice for living rooms where guests might lean against the wall. Calacatta and Carrara are the classic whites, while Portoro (dark with bold veining) makes a dramatic statement.
The catch? Marble is porous. Etching from acidic spills and staining from oils and dust are real risks. Sealing with a quality penetrating sealer (applied every 1–3 years depending on traffic) is non-negotiable. Many DIYers skip this step and regret it.
Limestone, travertine, and slate offer similar luxury appeal with slightly more durability. Look for honed or tumbled finishes on natural stone, they’re less slippery and hide wear better than polished versions. Expect to pay $8–15+ per square foot for marble or premium natural stone, versus $1–4 for ceramic subway tiles. That gap matters when you’re covering 200+ square feet.
Choosing The Right Tile Material & Finish
Ceramic vs. porcelain: Ceramic is fired at lower temperatures, making it softer and more porous than porcelain. Porcelain is denser, more stain-resistant, and better for wall applications where moisture or spills are possible. Both are cheaper than natural stone, typically running $1–6 per square foot.
Natural stone (marble, limestone, slate) feels upscale but requires sealing and careful maintenance. It’s softer than ceramic or porcelain, so consider it for low-impact areas or design-focused homeowners willing to fuss over maintenance.
Glass and metal tiles are specialty options for accents or small areas. They reflect light and add contemporary flair but can feel cold in large quantities. Use them sparingly, as a border or single accent strip, unless you’re going full modern minimalist.
On finish, matte and satin are more forgiving than gloss in living spaces. They hide fingerprints, water spots, and dust better, and they’re less slippery underfoot (though living room walls aren’t a slip hazard, smooth finishes can feel less tactile). Dark or deeply colored tiles require more frequent wiping to show water spots and dust.
Consider your living room’s light. North-facing rooms with soft, cool light suit pale or blue-toned tiles. South-facing spaces with warm, golden light look richer with warm whites, creams, or soft earth tones. Modern home decor trends often favor larger-format, neutral tiles in open-concept spaces, which makes sense, they feel less busy and expand visual space.
Budget matters. Premium porcelain tile-look planks that mimic wood or natural stone can run $3–8 per square foot. If covering a full accent wall (say, 200 square feet), that’s $600–1,600 before labor or installation supplies. Ceramic subway tiles cost $200–400 for the same area, making them budget-friendly for renters or experimental homeowners.
Installation & Maintenance Best Practices
Prep work decides success or failure. Your living room drywall must be clean, dry, and structurally sound. Any damp, soft, or uneven spots invite failure. Apply a waterproofing primer (like RedGard) to areas prone to condensation or splashes, behind bar areas, near fireplaces, or high-humidity zones. Let it cure per manufacturer instructions (typically 24 hours) before tiling.
Measure and snap chalk lines so your tile layout looks balanced. If your wall is out of plumb (leaning), you’ll cut the last column of tiles unevenly, plan for that. Dry-lay your first row to catch misalignment before spreading thin-set mortar.
Use the right thin-set. Modified thin-set works for most living room walls: unmodified thin-set suits natural stone and some porcelains. The bag should say “for wall tile.” Spread with a notched trowel (typically 3/16×5/32-inch for small tiles, 1/2-inch for larger formats) at a 45-degree angle to create consistent ridges. Those ridges ensure proper adhesion: skip them and tiles will crack or hollow over time.
Grouting matters. Non-sanded grout suits grout lines under 1/8-inch: sanded grout is better for wider joints (1/4-inch and up) because it resists cracking. Pre-mixed grout is convenient but pricier: powder grout costs less and lets you control consistency. Seal grout after it cures (typically 48–72 hours) to prevent staining, especially important with marble or light-colored grout.
Installation difficulty depends on tile size and your layout. Straight subway tile on a simple wall? Manageable for patient DIYers with basic tools: a wet saw, notched trowel, grout float, and tile spacers. Herringbone or complex mosaics? That’s slower and demands more cuts and precision. Large-format tiles (18×36 inches) are faster to install but require perfectly flat drywall, any lumps telegrave through and tiles crack. Many DIYers hire out large-format or complex layouts. Labor typically runs $5–15 per square foot depending on region and complexity.
Once installed, maintenance is straightforward. Wipe with a damp cloth weekly and a pH-neutral cleaner monthly. Avoid acidic cleaners on marble or limestone, they etch. For sealed natural stone, reseal every 1–3 years based on water-bead tests (if water no longer beads up, it’s time). Unsealed ceramic or porcelain tile needs only regular cleaning.
Consider checking home design inspiration before finalizing your layout, seeing real installations in similar living rooms helps avoid regrettable choices. Similarly, interior design ideas showcase how different tile choices pair with furniture and lighting, offering practical insight that showroom displays can’t replicate.
Conclusion
Wall tiles in your living room aren’t just a surface, they’re an investment in durability, style, and ease of care. Whether you choose humble subway tiles, dramatic marble, or textured stone-look porcelain, the key is honest assessment of your maintenance tolerance, budget, and skill level. Start with prep work, measure twice, and don’t rush the install. The difference between a polished, professional-looking tile wall and a regrettable DIY mistake often comes down to patience and proper technique. If large-format layouts or natural stone intimidate you, bring in a professional, it’s money well spent for a feature that’ll anchor your living room for years to come.